1. Welcome to Note
With Note you can sketch ideas anywhere, create beats and melodies, and sample your environment. Using Ableton’s cloud service, you can send your Sets from Note to Live or other iOS devices to refine them further. Or you can export Sets as audio files directly from your iOS device.
1.1 Setup
Note is available to purchase from the App Store and is supported on iOS 15.0 or higher.
To use Ableton Cloud an ableton.com account is required to authorize the service.
To prevent Ableton Cloud from using mobile/cellular data, go to your iOS Settings > Note and switch off the Mobile/Cellular Data toggle. Cloud will then only transfer Sets if WiFi is enabled.
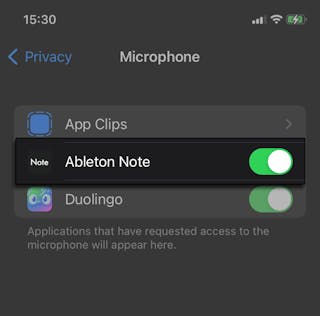
To record samples, Note will ask for permission to access the microphone when the app is first launched. You can also allow access by going to your iOS Settings > Privacy > Microphone.
2. App Settings
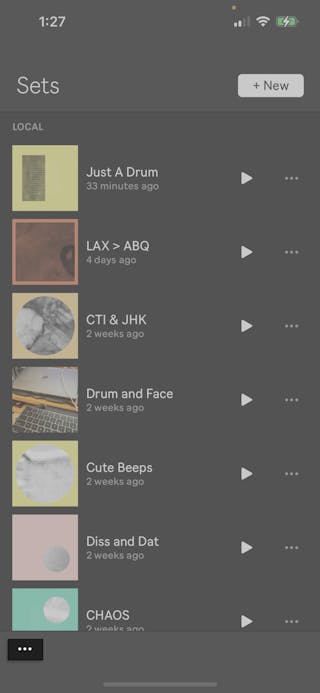
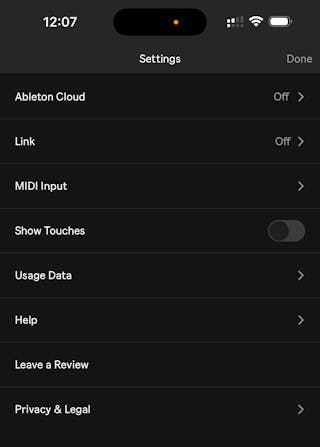
You can access app settings by tapping the three dots located in the bottom-left corner of the Set Library.
2.1 Ableton Cloud
Ableton Cloud is a service that sends Note Sets directly to Live’s browser, and shares them across iOS devices. Cloud can store up to five Note Sets.
To enable Ableton Cloud in Note, open the App Settings and tap on Ableton Cloud. You can also set up Cloud by selecting Upload To Ableton Cloud from the Set Options menu of any local Note Set in your Set Library. Switching the toggle on will activate Cloud and open ableton.com in a web browser, you can then follow the prompts to connect the service to your Ableton User Account.
If you have mobile/cellular data on your iOS device switched off, Ableton Cloud will only begin transferring Sets when connected to WiFi.
Ableton Cloud can also be activated in Live (version 11.2.5 and later). To enable cloud functionality, open Live’s Preferences, go to the Library tab, and switch the Show Cloud option to On.
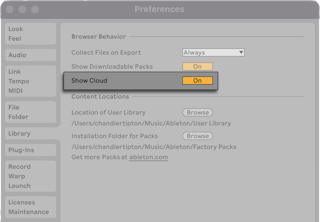
Once enabled, a Cloud label will appear in the Places section of Live’s browser, along with a message prompting you to sign in to ableton.com. Click the Sign In button to open a web browser window. This will lead you through the same authorization process required to activate Ableton Cloud in Note.
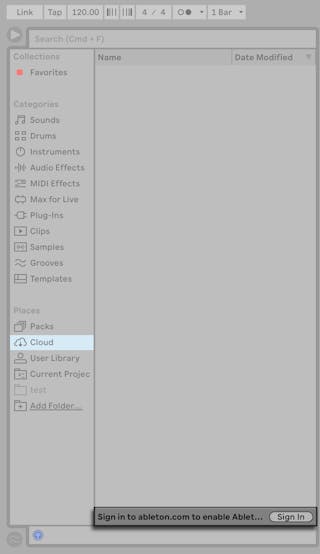
After activating Ableton Cloud for your Ableton User Account, any Note Sets that are uploaded to Cloud will appear in Live’s browser in real-time, assuming both devices are connected to a reliable network and logged in with the same User Account.
Please note that factory and imported samples for transferred Sets are stored in Live’s User Library, which must be set and accessible whenever using Cloud. If you open a transferred Set and see that samples are missing, check whether your User Library is set to a custom location, such as an external hard drive. To find the samples again, make sure any custom location for the User Library is accessible. We also suggest using Live’s Collect All and Save command, available from the File menu, when saving transferred Sets, which will gather all of the Set’s external files into a single Project folder.
Read more about transferring Sets to Ableton Cloud in the Transferring and Exporting Sets chapter.
2.2 Link
You can enable Link to sync Note with other Link-enabled products.
Ableton Link is a technology which keeps devices in time over a wired or wireless network. With Link enabled, you can start and stop playback of Note independently of every other connected device or application. Link-enabled software will remain in tempo as well as at the correct position in relation to the global launch quantization of all participants.
In most cases, Link will work without issues as soon as it is enabled and will provide reliable synchronization under all conditions. If you have further questions or run into issues, we recommend checking out the Using Link in Note article in the Ableton Knowledge Base.
2.3 MIDI Input
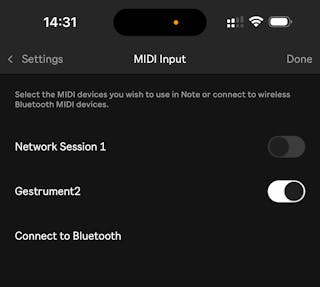
The MIDI Input page allows you to set up Note to receive MIDI signals from driverless USB class-compliant MIDI controllers, either via USB or Bluetooth. Note can also accept MIDI input from your computer (using Bluetooth or a macOS virtual MIDI network), as well as from other iOS apps.
Once a MIDI input source is connected, you can enable it for use with Note. This will allow you to instantly add notes received from this source to the clips in your Note Set. The MIDI input source will be automatically enabled for use next time you open Note and connect the source. If you do not want the source to be enabled by default, make sure to switch off its toggle before disconnecting the source from Note or before closing the app.
To connect a USB MIDI controller to Note, simply plug the controller into your iOS device and it will be instantly recognized and added to your list of MIDI devices in Note. Depending on your setup, you may need to use an adapter (Lightning to USB for example), or a powered USB Hub (if your MIDI controller’s power usage exceeds the power output of your iOS device).
Once you see the MIDI controller listed on the MIDI Input page, enable it for use with Note by switching on the toggle next to the controller’s name.
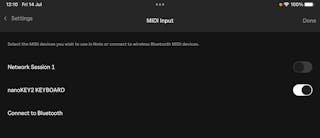
In order to connect a wireless MIDI controller via Bluetooth, tap on the Connect to Bluetooth option. If Bluetooth is switched off on your iOS device, you will see a pop up message asking you to allow new connections in your device’s Settings. Once Bluetooth is enabled, a screen will appear in Note showing a list of discovered Bluetooth MIDI devices. If your class-compliant MIDI controller does not appear on the list, make sure that you enable Bluetooth on the controller and set it to pairing mode if necessary.
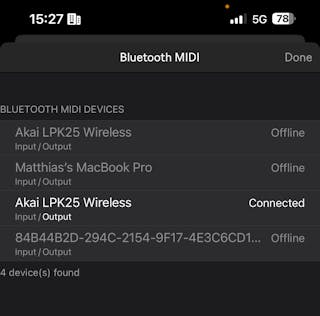
Select the MIDI controller you want to use and it will appear in the list of MIDI devices on the MIDI Input page. Enable the controller for use with Note using its toggle.
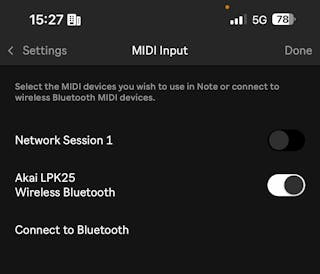
Note can also receive MIDI input from your computer over Bluetooth, with the connection established in the same way as outlined above for wireless MIDI controllers. Alternatively, you could set up Note to receive MIDI signals from your computer using a macOS virtual MIDI network. To learn more, please refer to the Setting up a virtual MIDI network article in the Knowledge Base.
To get MIDI input into Note from another iOS app on the same device, simply open the other app and it will automatically appear in the list of available devices on the MIDI Input page in Note. Enable the other iOS app for use with Note using its toggle. You may need to go into the settings of the other app to make sure that sending out MIDI signals is enabled.
2.4 Show Touches
Enabling Show Touches adds a small white circle to the display that follows your finger gestures as you navigate around Note. This can be a helpful visual indicator when recording performance videos and tutorial content.
2.5 Usage Data
This page contains two options for sharing data about your experience with Note in the background. Here you can choose to share general Usage Data or Crash Reports with our developers.
2.6 Help
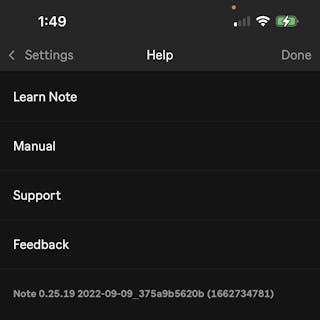
The Help page contains several options for getting help with Note. Here you will find links to watch a tutorial video, read the Note manual, find relevant articles in the Ableton Knowledge Base, or submit feedback about the app. This page also displays the exact version number of your Note installation.
2.7 Privacy & Legal
The Privacy & Legal page provides access to the End User License Agreement, Third Party License Information, and the Privacy Policy on the Ableton website.
3. Creating and Managing Sets
3.1 Creating New Sets
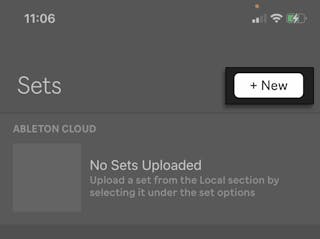
Tap on the + New button to create and open a new Set. Each track is pre-loaded with a drum, bass, melodic instrument, or Sampler preset.
3.2 Sets Library Overview
When you open Note you will see the option to create a new Set, as well as any previous Sets you’ve created, and some Demo Sets. Sets that have been uploaded to Ableton Cloud appear in the respective section, and Sets that are only stored on your device appear in the Local section.
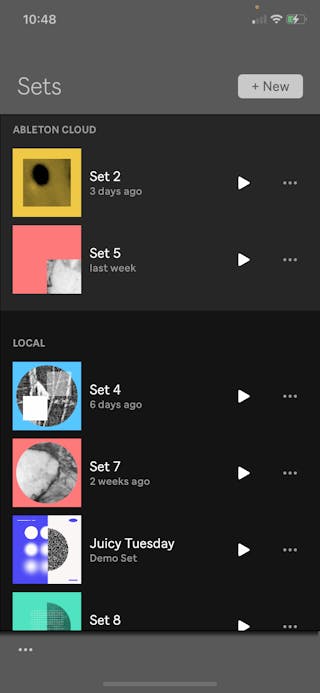
Tap on the play button next to a Set name to start playback of that Set.
3.3 Set Options
Tap on the three dots next to the play button to display various Set options.
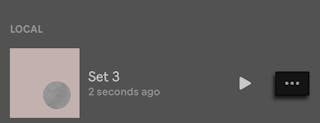
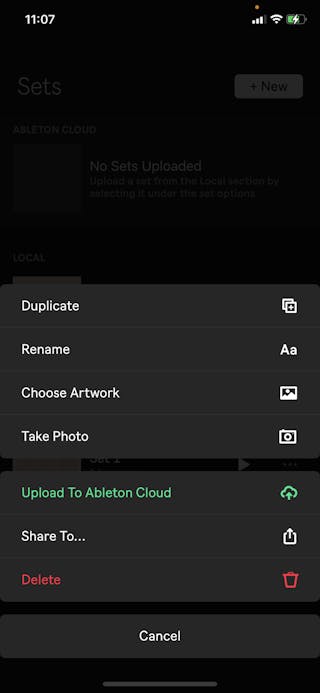
You can duplicate and rename a Set, as well as choose artwork for the Set from your Photo Library, or take a photo to use as artwork.
You can also upload the Set to Ableton Cloud, which will transfer the Set to Live and then generate a Set folder which you can access from Live’s browser.
If you are logged into Ableton Cloud with your ableton.com account on multiple devices, your transferred Sets will show up in the Cloud section on every device that has Note installed.
Share To… allows you to share your Set to AirDrop or other iOS apps, copy the Set, or save it to the Files app. Sharing the Set creates an .ablbundle file (e.g., “MySong.ablbundle”), which is similar to a Live Set, and includes all samples and metadata. Shared .ablbundle files can be opened in other instances of Note or in Live (version 11.2.5 and later).
4. Session View
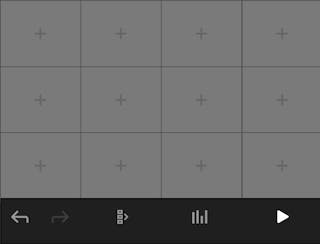
When you open a Set you will see the Session View, which contains tracks, clips, scenes, Set settings, a mixer, and a play/stop button.
You can always get back to the Sets Library by tapping the back arrow to the left of the Set name.
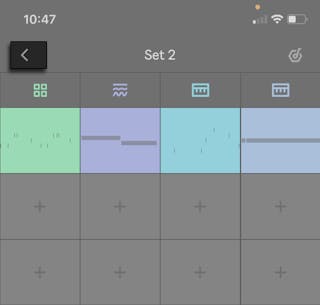
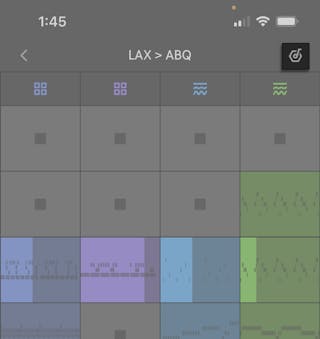
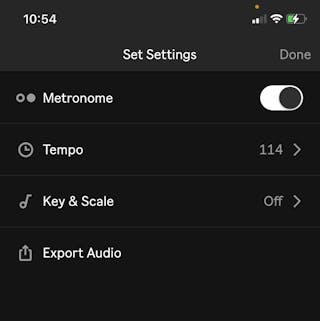
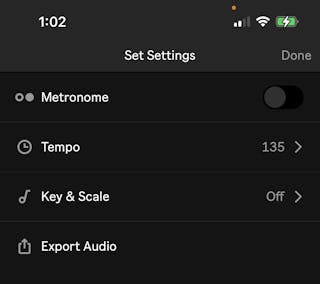
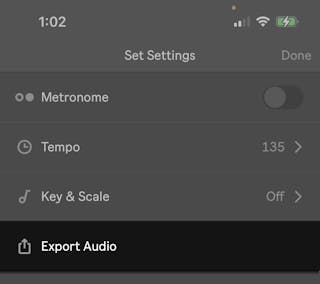
To the right of the Set name you can access the Set’s settings, where you can choose the tempo, switch the metronome on or off, pick a key and scale for the Set, or export the Set as an audio file.
4.1 Tracks
In a new Set you will see three default tracks. You can add more tracks (up to eight total) by swiping to the left and tapping the Add Track  icon on the right.
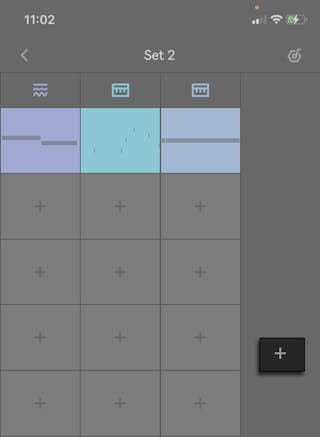
Tracks are arranged vertically, similar to Live’s Session View.
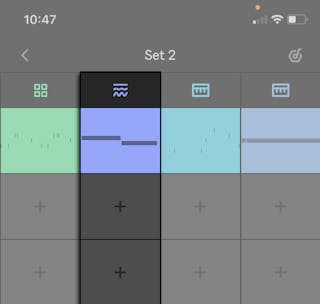
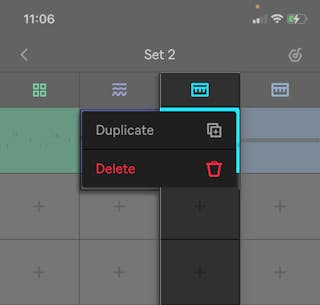
You can long-press on tracks to drag them around and rearrange them. You can also long-press on tracks to access Duplicate and Delete commands.
4.2 Clips
Clips contain your captured loops and are the building blocks of your tracks.
In a new Set, you will see an empty grid of squares beneath the track headers. These are empty clip slots where you can add new clips to the track. To add a clip, tap the Add Clip  icon in a track.
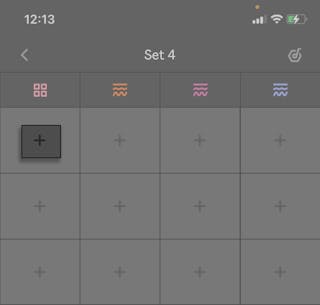
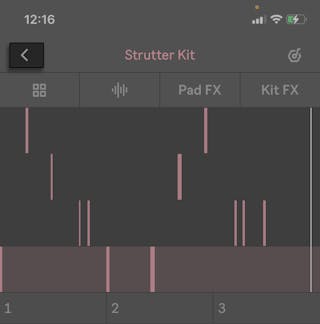
Adding a new clip takes you to the Instrument View, where you can record performances on the pads, edit recorded notes, and adjust the instrument and audio effect parameters.
To get back to the Session View from the Instrument View, you can tap the back arrow to the left of the Set name.
Tap on a captured clip to start its playback on the nearest downbeat. When a clip is playing, you will see a square Stop Clip icon, which you can use to stop the clip’s playback.
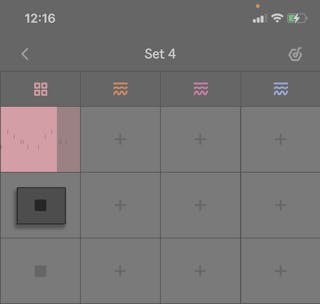
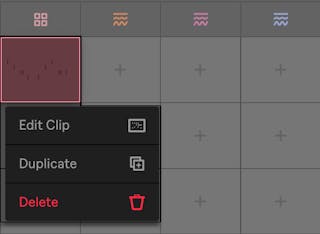
Additionally, you can long-press a clip and then drag to move it to another clip slot on any track. You can also long-press on clips to access Edit Clip, Duplicate, and Delete commands.
4.3 Scenes
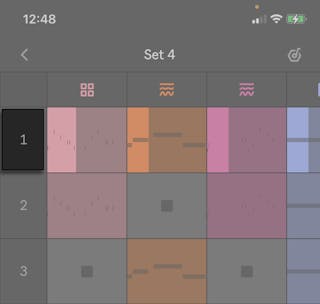
Scenes are made up from various clips that are on the same horizontal row. You can play individual clips from different scenes by tapping on them during playback. Or you can launch a scene itself by tapping on the scene number, which will play all clips in the selected scene.
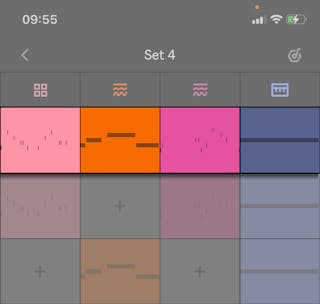
Each Set can have up to a maximum of eight scenes.
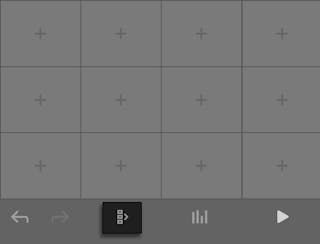
To display the scene numbers, tap on the Show/Hide Scene Numbers icon at the bottom of the Session View grid.
You can tap a scene number to launch all clips in that scene.
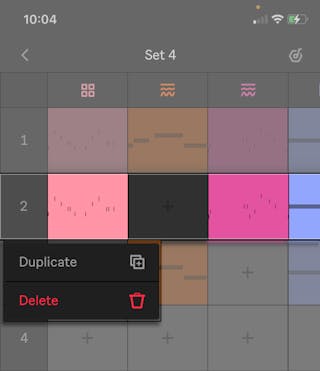
Long-press on a scene number to drag and rearrange it, as well as access duplicate and delete commands.
4.4 Mixer
You can access the mixer for your Set by tapping the Show/Hide Mixer icon at the bottom of the Session View grid.
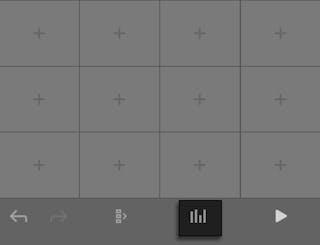
Tap M to mute a track or S to solo it.
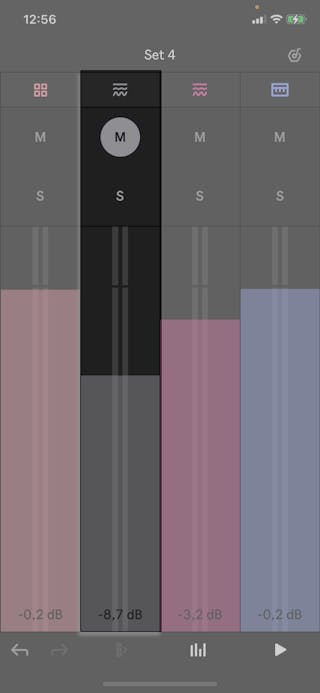
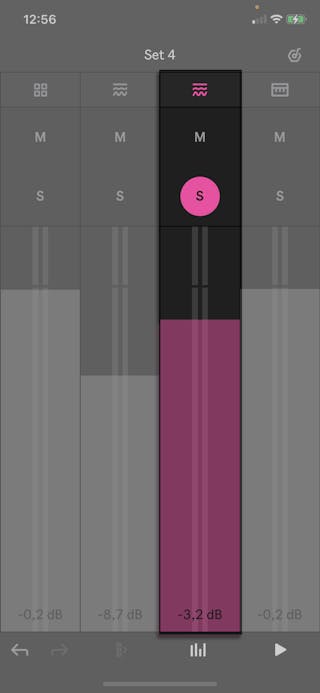
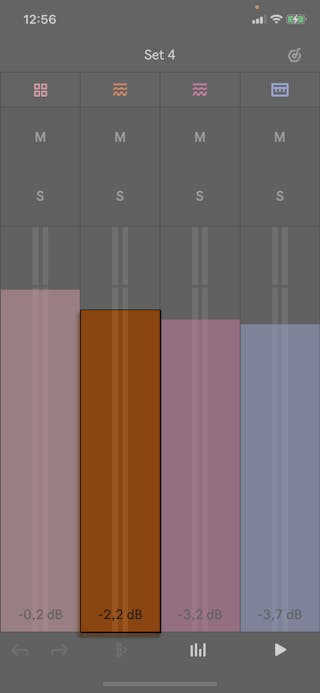
Use the sliders to adjust the track’s volume.
4.5 Session View Actions
At the bottom of the Session View grid you can access Undo/Redo commands, the Set’s mixer, a toggle to show/hide scene numbers, and a global Play/Stop button.
5. Set Settings
To access Set-specific settings, tap the Set Settings icon in the upper right corner of a Note Set.

5.1 Metronome
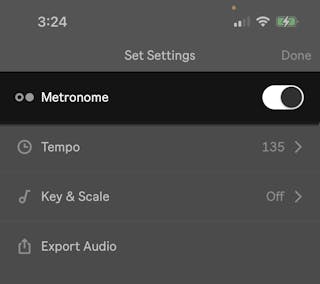
The easiest way to record in sync with a set tempo is to play along with the built-in metronome. The metronome will start ticking when you enable its switch in Set Settings, then press the Play button or launch a clip.
5.2 Tempo
Select Tempo to access the Set’s tempo settings.
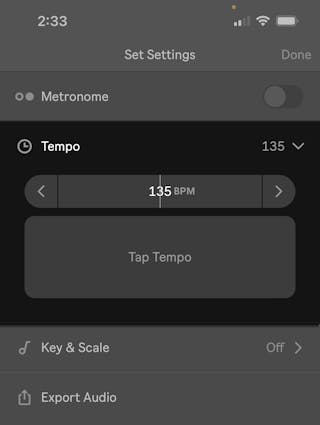
Here you will find three different ways to adjust the Set’s tempo:
Drag the slider horizontally to make coarse tempo adjustments.
Tap the arrows at the left and right sides of the slider to make fine tempo adjustments of 1 BPM per tap.
Tap the Tap Tempo button. After four initial taps, the tempo will be set based on the speed of your taps. If you continue tapping beyond those four beats, the tempo will update continuously to match the speed of your taps.
5.3 Key & Scale
Select Key & Scale to unfold a submenu that provides access to the Set’s key and scale settings.
The In Key switch is turned off by default, allowing you to play all twelve notes in a Western chromatic scale in Note’s Pad View. However, you can enable this switch and use the key and scale buttons to select any root note and scale type of your choosing. This will snap the pad layout for melodic instruments to notes within the scale.
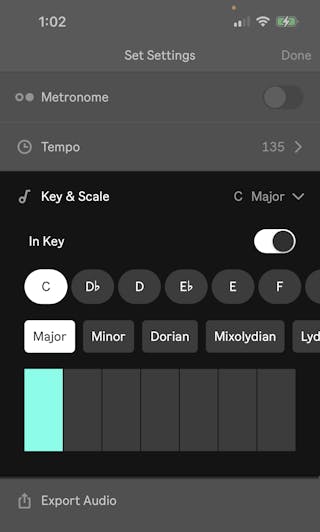
A set of melodic pads are also included, so you can hear the key and scale settings before using them in the Set. The pad sound preview uses whichever melodic instrument was last selected to generate its preview sound. The In Key options will be greyed out if no melodic instruments are present in the Set.
5.4 Export Audio
You can use this option to access audio export settings for your Set. Read more about exporting audio from Note in the Transferring and Exporting Sets chapter. If no clips are present in the Set, the Export Audio option will be greyed out.
6. Instrument View: Capturing Clips
You can play and capture your performances in the Instrument View.
To open Instrument View while in Session View, double-tap on any existing clip, tap the Track header, or tap on the Add Clip  icon in any of the empty clip slots in a track (which will also create a new clip).
6.1 Fixed Length Capture
Add a clip by tapping on an empty clip slot in a track, which will take you to the Instrument View. Tap the plus icon at the bottom of the clip area to add a clip with 1, 2, 4, or 8 bars.
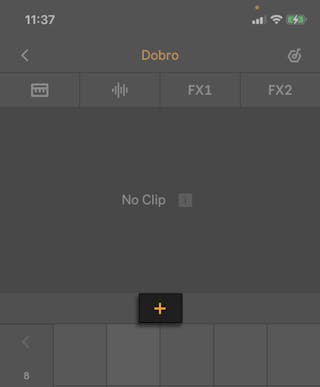
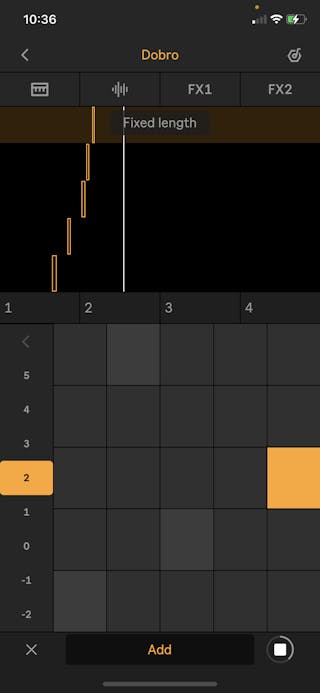
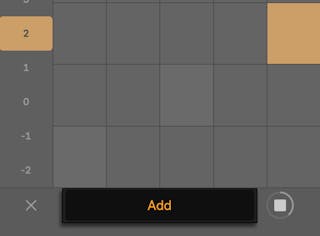
Once a clip has been added, you can play the pads and notes will be added to the Clip View window. The clip will keep looping until you tap the Add button at the bottom of the Pad View, which will add the notes to the clip. This way of capturing performances is called Fixed Length.
If Note’s transport is stopped, and you are capturing a clip for the first time, the Set’s tempo will be automatically set based on your performance.
6.2 Free Length Capture
You can also start playing pads without adding a clip and then capture your performance. This way of capturing performances is called Free Length.
If Note’s transport is stopped, you can play for up to eight bars, and then tap on the Capture button to create a clip of your performance.
If Note’s transport is stopped, and you are capturing a clip for the first time, the Set’s tempo will be automatically set based on your performance.
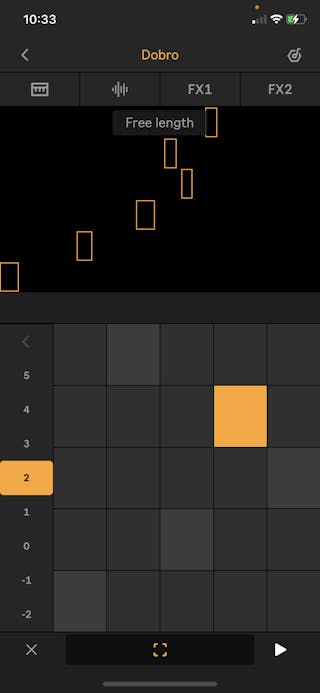
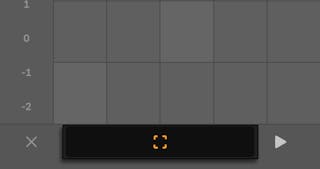
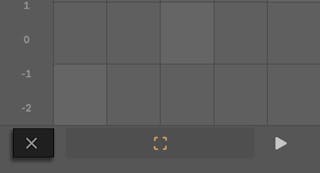
You can tap the X icon next to the Capture button to clear any notes you’ve already played if you want to start your performance again.
If Note’s transport is running and there are other clips in the Set, you can start playing and then tap on Create Clip to capture your performance. Any newly captured clips will have at least as many bars as the shortest clip already in the Set.
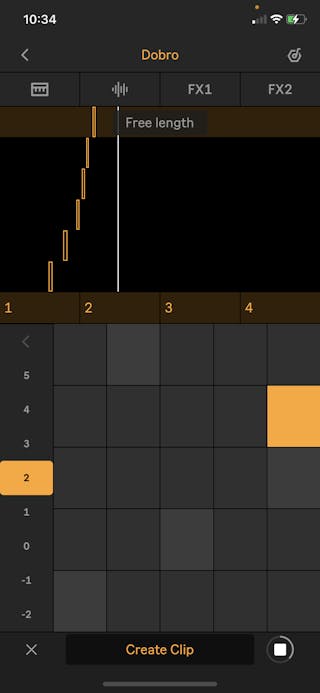
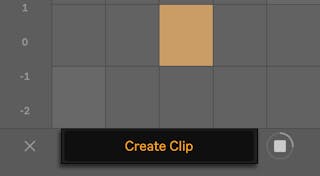
If you have a captured clip and Note’s transport is running, you can add more notes to the clip by playing pads and tapping the Add button.
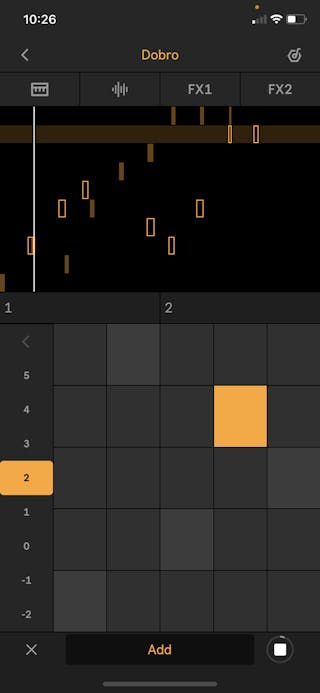
If you have a captured clip and Note’s transport is stopped, you can start playing the pads again to capture new clips.
6.3 Pad Performance Options
You can access various performance options by tapping the Pad Performance Options icon below the pads.

In a Drum Rack you will see the following options:
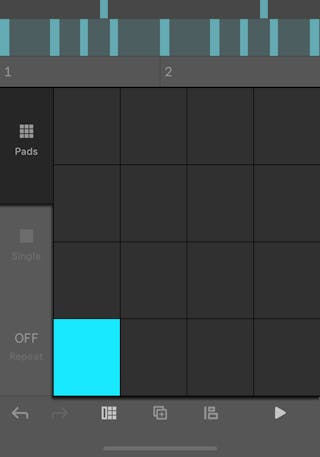
Pads — Drum Racks use a 4x4 grid of playable pads by default. However, you can also switch to a Single pad layout while capturing clips or go back and forth between the 4x4 grid and the Single layout as needed.
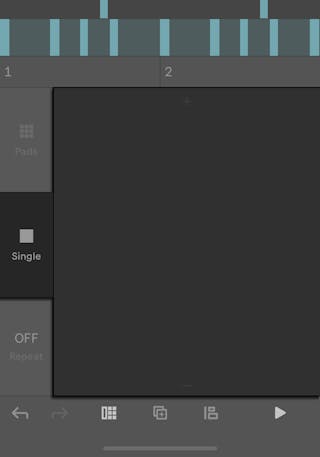
Single — this layout provides detailed control over a single drum pad. First select a pad using the Pads layout, then switch to the Single layout. The 4x4 pads will be replaced with one large, velocity-sensitive performance area; taps on the upper half of this area create higher-velocity notes while taps on the lower half create lower-velocity notes. Note: this option only appears for Drum Racks.
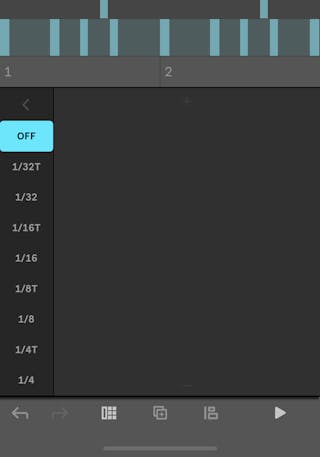
Repeat — this option opens a submenu of buttons that represent common beat divisions. Hold a pad and tap one of the submenu buttons to repeat held notes at that rate, or switch between different beat divisions to create rhythmic variations. You can also select OFF to switch off the feature altogether. Repeat can be used in both the Pads and Single layouts.
In a melodic instrument you will see the following options:
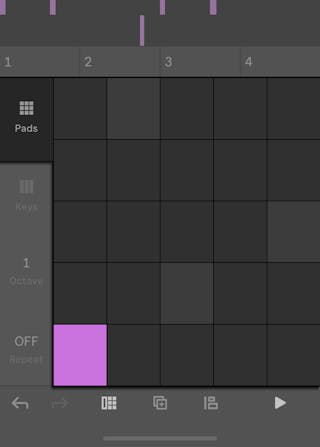
Pads — melodic instruments use a 5x5 grid of playable pads by default. However, you can also switch to the Keys layout (explained below) to use a more traditional keyboard setup. Otherwise, you can always go back and forth between using the 5x5 grid and the Keys layout as needed.
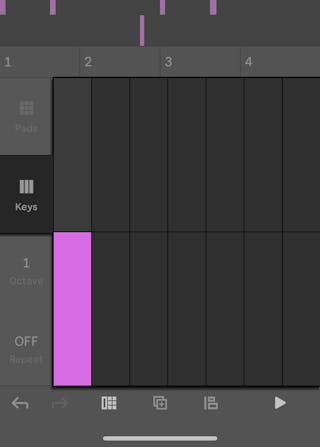
Keys — this layout replaces the Pads layout with a two-octave keyboard.
If the In Key switch is enabled in the Key & Scale settings, the Keys layout will appear as a row of identical rectangles. When the switch is turned off, a more familiar piano-style chromatic keyboard will appear instead, complete with sharp and flat notes.
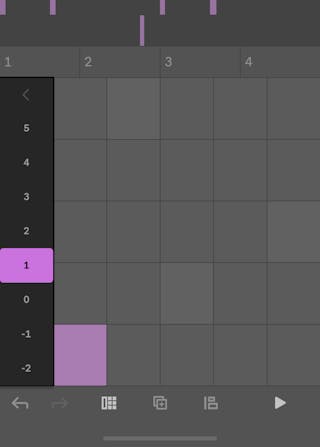
Octave — this option opens a submenu of buttons that allow you to change the octave of the Pad View.
Repeat — you can use the Repeat function in the same way as described for Drum Racks above. Note: the Repeat feature works with both the Pad and Keys layouts.
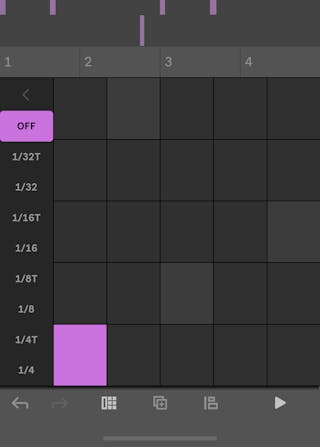
Lastly, please note that the state of a track’s Pad Performance options are specific to that track and saved with the Set. For instance, if one track is using the Keys layout, and another is using the Pad layout with a Repeat function of 1/8th notes, these settings will remain after you close and reopen the Set.
7. Instrument View: Devices and Effects
In the Instrument View you can add presets to your tracks, as well as refine their sound using different parameter settings and effects.
To open Instrument View while in Session View, double-tap on any existing clip, tap the Track header, or tap on the Add Clip  icon in any of the empty clip slots in a track (which will also create a new clip).
7.1 Using Presets
Note comes bundled with a wide selection of instrument presets, audio effect presets, and samples.
Adding a new track to a Set will load a Track Preset, which contains a random instrument preset with a set of two audio effects, from the Core Library.
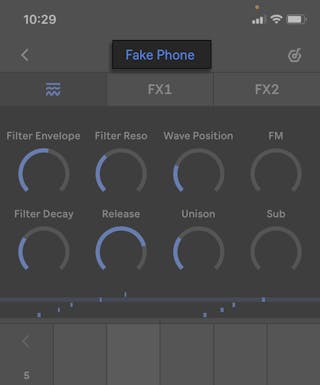
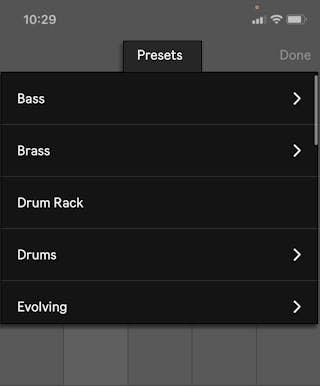
You can tap on the preset name in a track to view the list of available presets in the same category.
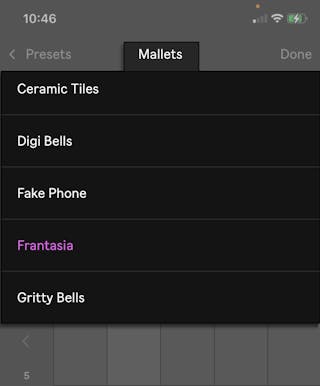
Tap on a preset name in the list to trigger an audio preview of the device’s sound. When you tap on a preset name, you can also play the pads in the Pad View below the preset list to test out the sound. Tap Done to add a selected preset to your track.
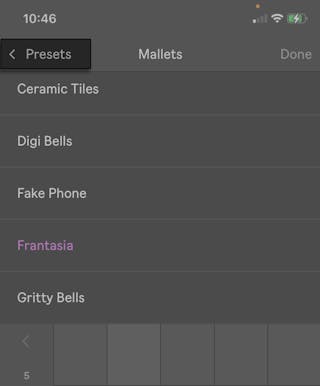
You can also tap on Presets to see the full list of available instrument categories.
7.2 Device Parameters
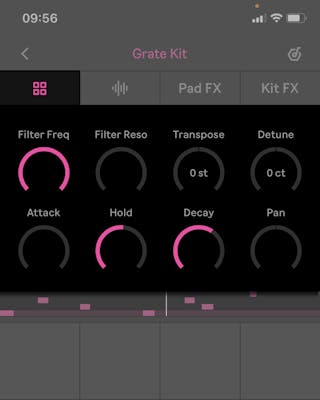
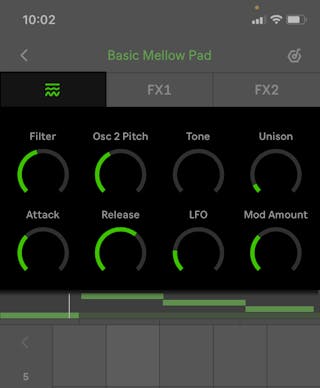
Different parameters are available depending on whether your track contains drum presets, melodic instrument presets, or Sampler instruments.
In tracks containing drum presets, you will find filter frequency, filter resonance, transposition, detune, attack, hold, decay, and panning parameters that affect the entire Drum Rack in the first tab above the Pad View.
In tracks containing melodic instrument presets, you will find various global parameters depending on the type of instrument in the track in the first tab above the Pad View.
In tracks containing Sampler instruments, you will find filter frequency, filter resonance, transposition, detune, attack, decay, release, and LFO parameters in the first tab above the Pad View.
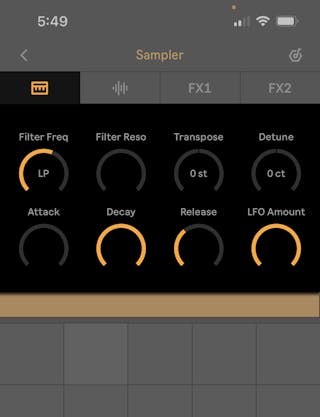
In Sampler, you can switch between two LFO parameter options. LFO Amount is selected by default, but you can tap on the parameter name to open an options menu where you can select either LFO Amount or LFO Rate.
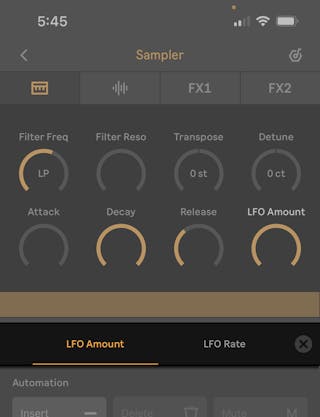
When adjusting device parameters, you can drag the knobs up or down for coarse adjustments, or left or right for fine adjustments.
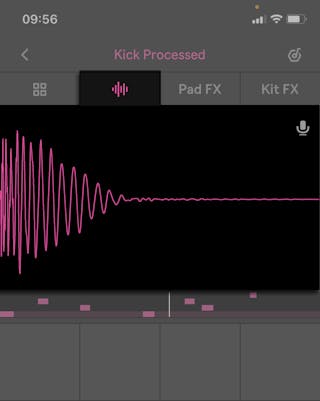
7.3 Sample View
In tracks containing instruments that use samples, such as Drum Rack or Sampler, you will find the Sample View in the second tab above the Pad View.
7.4 Using Samples
You can import sample files into Note using AirDrop or the Share option from different apps. Note supports WAV, AIFF, and M4A files. M4A files will be converted to WAV files as soon as they are imported.
Samples can be added to tracks containing a Drum Rack or a Sampler instrument.
You can add samples to empty Drum Rack pads by adding a Drum Rack to a track and then selecting the pad that you want to add the sample to.
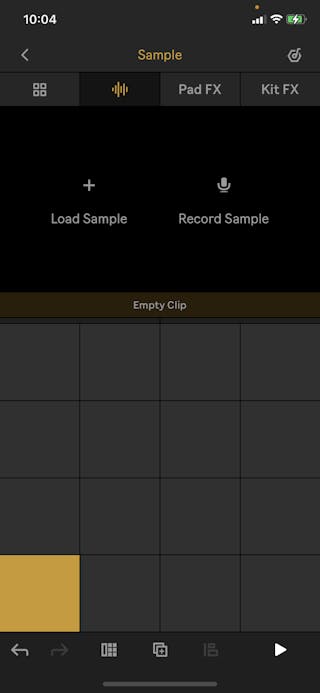
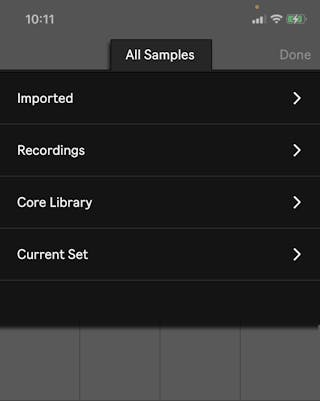
Tap Load Sample to select a sample from your imported files, recordings you have saved from within Note, the Core Library, or other recorded files from the Current Set.
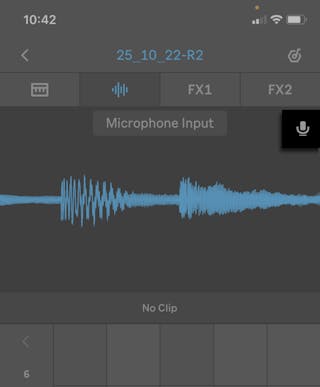
Tap Record Sample to record a new audio file directly into a Drum Rack pad. Tap on the pad that has turned red or the Stop icon in the upper right of the Sample View window when you’re done recording.
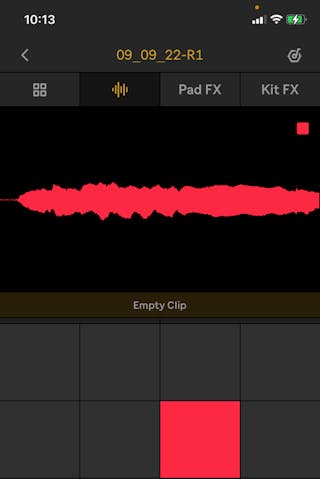
If you’re recording onto a pad, you can tap on a different pad to immediately start recording onto the newly selected one.
The recorded sample will automatically be cropped to start playing at the first detected transient. You can drag the sample waveform left or right to set a different starting point. Or you can use a two-finger pinch gesture to zoom in and out of the waveform while adjusting the starting point. You can drag up or down on the sample waveform to adjust the sample’s volume gain amount anywhere between +24 and -70 dB.
Adding samples to the Sampler instrument works in a similar way; you can either load or record samples into the device.
Sampler plays audio files at their original pitch on the C3 pad, otherwise the sample will be transposed across the scale accordingly depending on which note you tap.
7.5 Resampling Note’s Output
In addition to recording your own samples, you can also resample audio output from Note.
If other clips are playing in a Set, you can long-press on the microphone icon in the Sample View of a Drum Rack pad or Sampler device to access the Resample Output recording option.
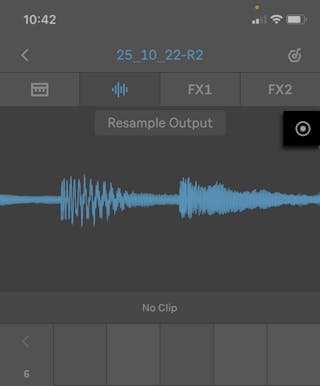
You can then record Note’s output. Tap the Stop button when you’re finished recording to add the audio file to the Drum Rack pad or Sampler device.
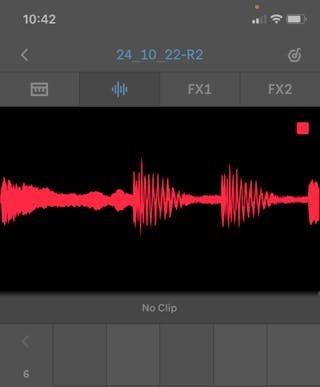
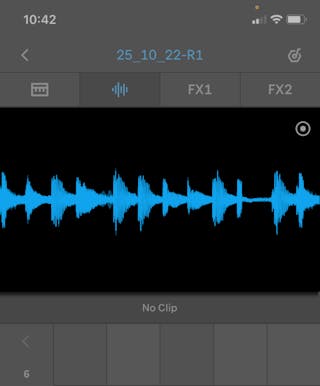
Long-press the Resample Output icon again to switch back to the Microphone Input recording option.
7.6 Sample Options
You can tap on the sample’s waveform to access additional Sample Options. The available options vary slightly depending on whether your track contains a Drum Rack or Sampler instrument.
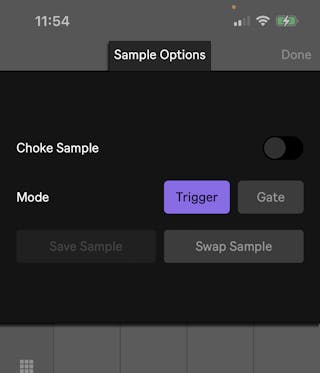
In a Drum Rack you will see the following options:
Choke Sample — enabling this option means that the sample will be stopped when other samples in the same Choke group are played. There is only one Choke group per Drum Rack.
Mode — you can set the Trigger/Gate mode for the sample. Selecting Trigger means the sample will play all the way through no matter when the note ends, while Gate means the sample will stop playing as soon as the note is released.
Save Sample — this option lets you save the sample to the Recordings section of the All Samples directory. The sample will be saved to the Drum Sampler folder. This option only appears if a sample has been recorded into a Drum Rack.
Swap Sample — you can use this option to swap out the pad’s sample with another one.
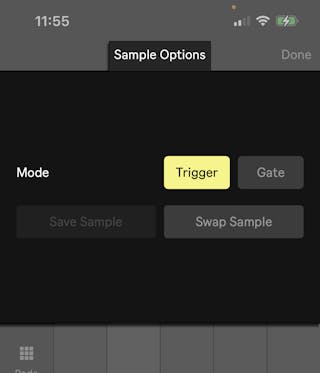
In a Sampler instrument you will see the following options:
Mode — you can set the Trigger/Gate mode for the sample. Selecting Trigger means the sample will play all the way through no matter when the note ends, while Gate means the sample will stop playing as soon as the note is released.
Save Sample — this option lets you save the sample to the Recordings section of the All Samples directory. The sample will be saved to the Melodic Sampler folder. This option is only available if a sample has been recorded into a Sampler instrument.
Swap Sample — you can use this option to replace the cell’s sample with another one.
7.7 Using Effects
When you add a Drum Rack or instrument preset to a track, two audio effects will also be included as part of the preset. You can change the effect parameters or swap out the effects for different ones.
In a Drum Rack preset, two audio effect slots are available: Pad FX and Kit FX.
The Pad FX tab is located in the third tab above the Pad View. The audio effect in this tab is only applied to the individual Drum Rack pad.
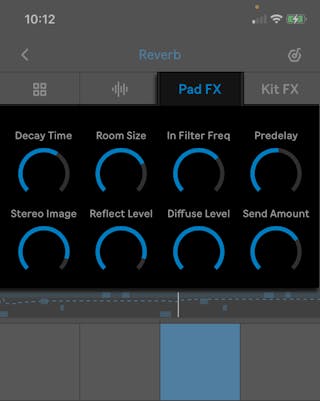
Various parameters will be displayed depending on the type of audio effect that is selected. The Send Amount knob adjusts how much of the effect is applied to the device in the selected Drum Rack pad.
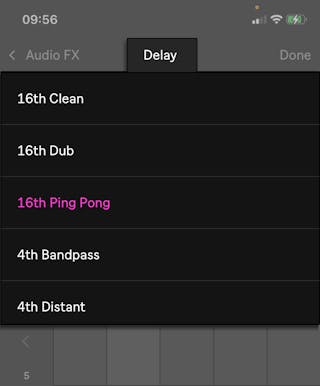
You can tap on the effect’s preset name to browse other effects and add them to the device.
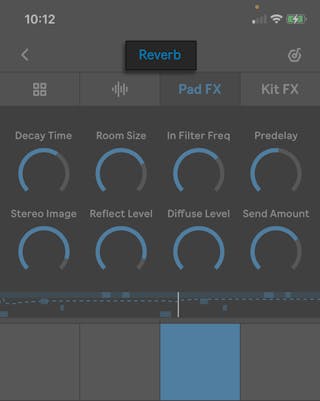
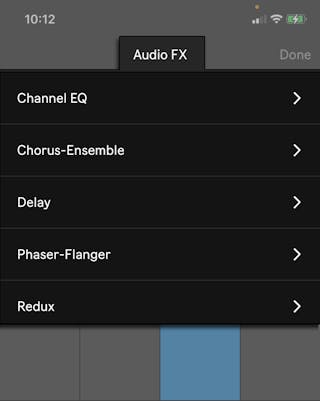
Tap Done when you want to add a selected audio effect to the track, or if no audio effect is selected, you can tap Done to get back to the Instrument View.
The Kit FX tab, located in the fourth tab above the Pad View, is similar to Pad FX but affects the entire Drum Rack.
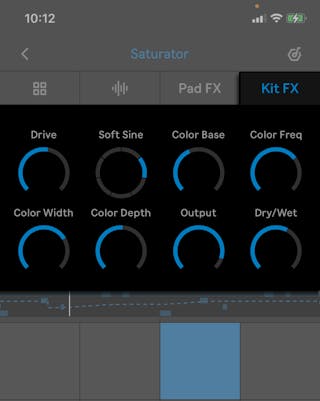
You can select and browse audio effect presets in the same way as described for the Pad FX tab. The Dry/Wet knob adjusts how much of the effect is applied to the Drum Rack.
In tracks containing melodic instruments or Sampler instruments, there are two available slots for audio effects, FX1 and FX2.
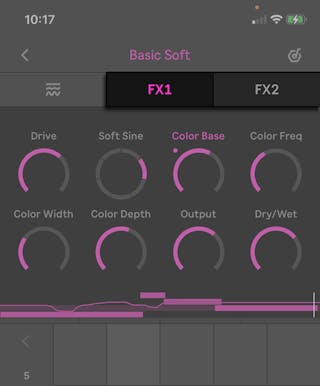
You can select and browse audio effect presets in the same way as described for the Pad FX tab. The Dry/Wet knob adjusts how much of the effect is applied to the instrument.
The audio effect in FX1 is added to the instrument’s sound first, and the result is then fed into FX2, which outputs the final sound.
7.8 Automating Parameters
You can make changes to device and audio effect parameters while a clip is playing and then capture those changes so that they play back automatically. These automatic parameter changes are referred to as automation. Automation is useful for adding variation to your sounds.
To automate a parameter, make sure Note’s transport is running, and then drag a device or audio effect parameter knob to add automation for the adjustments.
You will then see the automation appear as a dotted line in the Clip Mini Preview window below the device parameters.
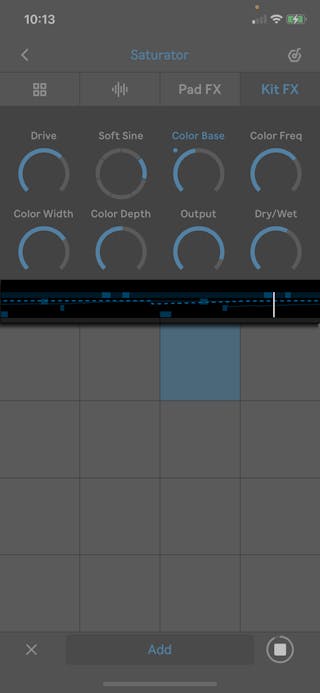
Tap the Add Automation button to capture the automation into the clip.
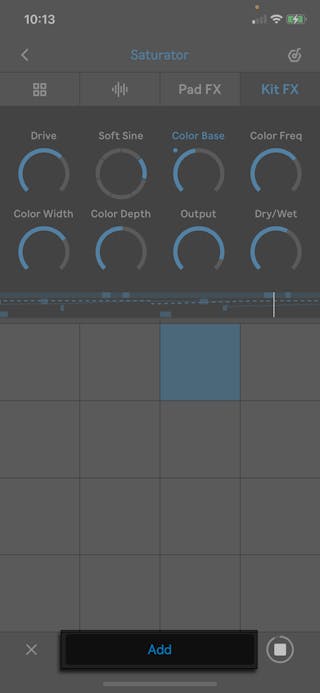
Captured automation will appear as a solid line in the Clip Mini Preview. Parameters with automation display a dot next to the corresponding knob. When transport is running, you will also see the automation changes reflected in the parameter’s automatic knob adjustments.
You can continue to change parameters even after automation has been captured. When adjusting parameters again, new dotted lines will appear in the automation, and you can tap Add to update the captured automation to save the new changes.
When Note’s transport is running, you can add automation changes by adjusting a parameter and tapping the Add button again, which will save any updates to the automation.
7.9 Parameter Options
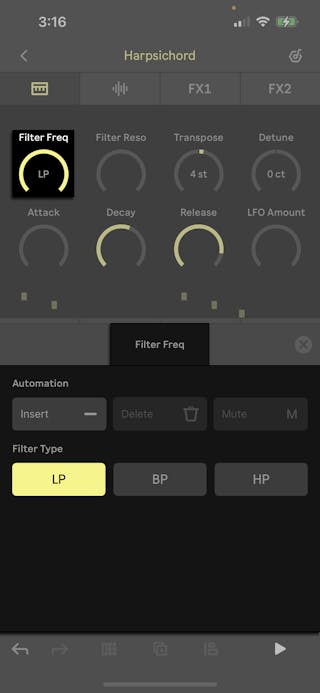
You can tap a parameter name to access the following automation commands:
Insert — adds a straight line of automation at the parameter’s current setting
Delete — removes any automation for the selected parameter
Mute — mutes any automation for the selected parameter while the Set is open (if the Set is closed and opened again, the automation will be unmuted)
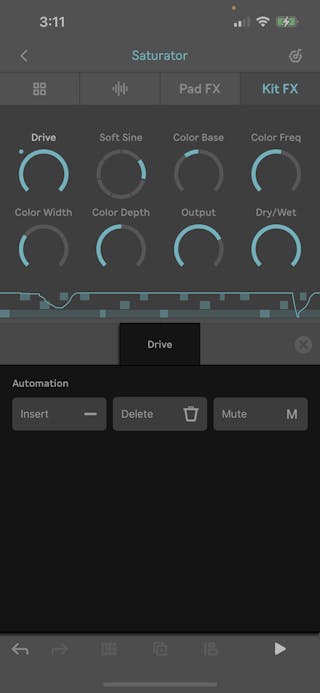
You can also switch the Filter Type for Filter Freq parameters in the options menu. Drum Rack samples include low-pass and high-pass Filter Type options, while Sampler devices include low-pass, band-pass, and high-pass Filter Type options.
8. Instrument View: Clips and Notes
8.1 Clips and Notes Overview
Performances are stored in Note as individual notes within containers called clips.
You can edit performances in the Clip View, which is part of Note’s Instrument View. To open Instrument View while in Session View, double-tap on any existing clip, tap the Track header, or tap on the Add Clip  icon in any of the empty clip slots in a track (which will also create a new clip).
8.2 Clip View
Note’s Instrument View typically displays device parameters front and center, with recorded notes shown in a Mini Preview window below.
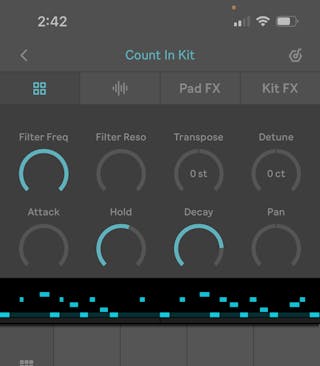
Tap the Mini Preview window to open Note’s Clip View, which provides a more detailed overview of the captured performance.
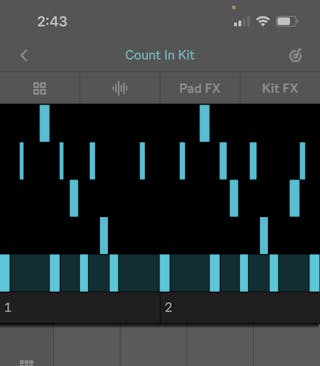
To fold Clip View back down, tap on any of the tabs above it.
8.3 Selecting Notes
With Clip View expanded, you can select notes to edit.
When you expand the Clip Mini Preview window, all of the notes are selected by default.
Tap the empty space between notes to select a specific row of notes and open the clip editing options (described in the following section). Tap the same empty space once more to select all of the notes in a clip.
You can go between selecting a single row and selecting all notes by tapping the empty space between notes again.
To select an individual note, simply tap it.
To select a specific group of notes, drag a selection box around the notes.
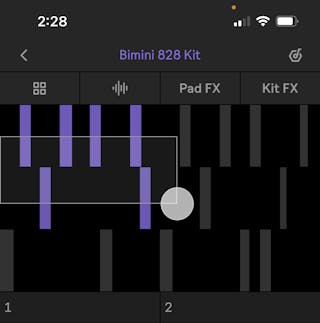
When leaving and revisiting a clip, selected notes in Clip View will no longer be selected.
8.4 Editing Notes
When selecting notes, three editing tabs appear below the Clip View window: Operations, Quantization, and Velocity.
Use the Operations tab to edit the placement and tuning of your selected notes.
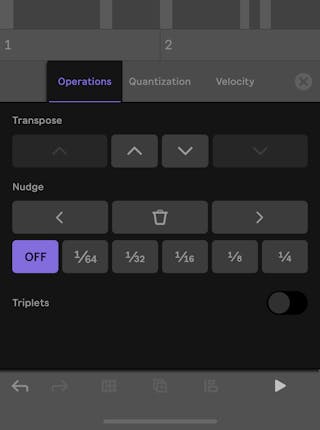
The Transpose buttons let you move selected notes up or down in fine or coarse movements. The inner pair of arrow buttons transpose notes one semitone at a time, while the outer pair of arrow buttons transpose notes up or down by entire octaves. For melodic instruments, the Transpose buttons will quantize notes to scale degrees if the Key & Scale has been set in Set Settings. In contrast, transposing notes in a Drum Rack has no effect on pitch. Instead, transposition moves notes to different sample pads within the rack.
The Nudge section is split into two rows of buttons. The upper row contains left and right Nudge buttons which move selected notes to the left and right, as well as a button to delete selected notes (represented by a trash can icon). The bottom row contains common beat division buttons; select one of these values to nudge selected notes by that amount, or set it to OFF to nudge selected notes in fine, unquantized amounts using the Nudge arrows in the above row.
The Triplets switch modifies the behavior of the Nudge section above it, allowing you to use the nearest triplet of a selected beat division. For example, enabling Triplets and selecting a ¼ note Nudge value will nudge the note by ⅓ of a beat.
Use the Quantization tab to snap selected notes to the chosen beat value on the grid. To do this, tap the Quantize Grid button corresponding to the desired meter value. Tap OFF to return the selection to its original position on the grid.
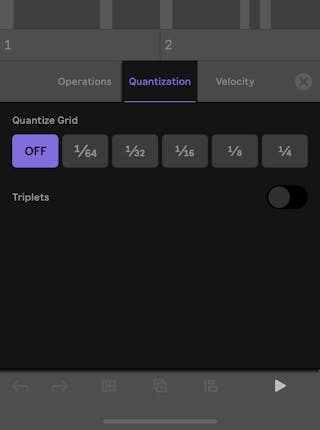
Another way to quickly adjust note placement is to use the Quantization icon, which is found in the bottom of the menu bar in Instrument View. Tap the icon once to immediately quantize all notes, or long-press the button to bring up the Quantization tab (described above).

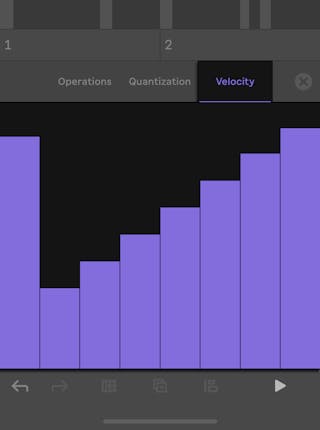
Lastly, use the Velocity tab to edit note velocity. The velocity of selected notes are represented by vertical sliders that can be moved up or down to increase or decrease their velocity. When editing velocity for multiple notes, use two fingers to create a velocity ramp between the left- and right-most selection.
8.5 Editing Clip Length
The numbered bars that appear at the bottom of the expanded Clip View window are used to modify clip length.
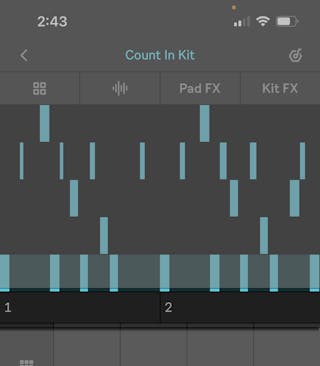
Swipe right on any number of bars to duplicate them, or swipe left to delete them. You can also tap specific bars to loop them; tapping them again returns the loop boundaries to the clip’s full length.
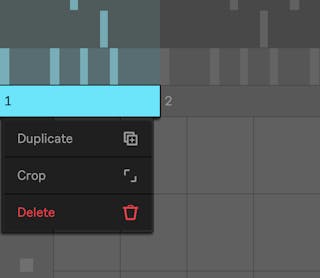
You can also long-press a bar to access Duplicate, Crop, and Delete commands.
8.6 Instrument View Actions
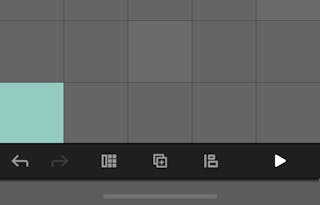
Below the Pad View you can access Undo/Redo commands, Pad Performance options, a Clip Duplication command, a Note Quantize button, and a global Play/Stop button.
9. Transferring and Exporting Sets
You can transfer a Set out of Note by uploading it to Ableton Cloud to send it to Live, or by exporting an audio file of the Set directly from Note to save it to your device or share it with other apps.
9.1 Transferring Sets using Ableton Cloud
Use Ableton Cloud to share your Note Sets with Live or other iOS devices that also have Note installed.
Tap the three dots next to a Set’s play button and select Upload to Ableton Cloud to upload the Set to Cloud.
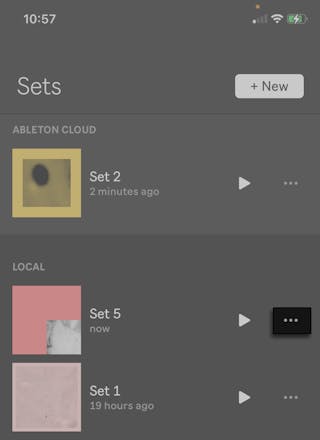
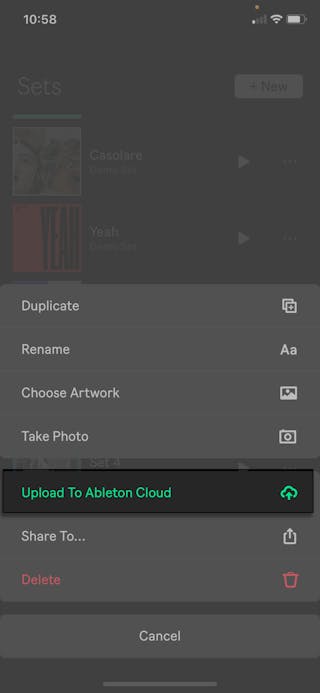
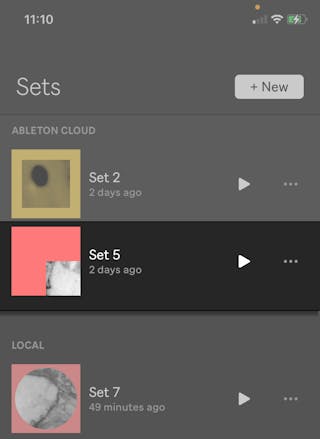
Once uploaded to Ableton Cloud, the Set will be available in Live’s browser in the Cloud folder in Places, as well as any instances of Note on other iOS devices that are logged into Cloud with the same registered email address.
You will also see the Set has been moved to the Ableton Cloud section of the Set Library in Note.
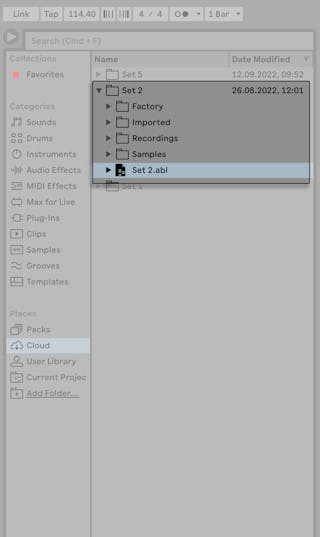
In Live you will see a folder for the uploaded Set has been added to the Cloud section of Places; this folder is similar to a Live Project folder. You can access individual samples and recordings, or expand the Set.abl file to access individual tracks. You can also double-click the .ablbundle file to open it as a Live Set.
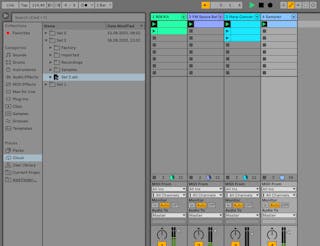
Important: when using Note content in Live — by opening Note Set .abl files as Live Sets, or by using individual samples or recordings from Note Sets — you should always make sure to use the Collect All and Save option from Live’s File menu in the corresponding Live Set. This collects and saves all external files referenced by the current Set, ensuring that the content isn’t lost if the Note Set is removed from Cloud.
It is also important to remember that sharing Sets between Note and Live only works in one direction: Sets from Note can be opened in Live, but not the other way around.
9.2 Exporting Audio
You can export an audio WAV or M4A file of your Set directly from Note and save it to your files or share it with AirDrop or other apps.
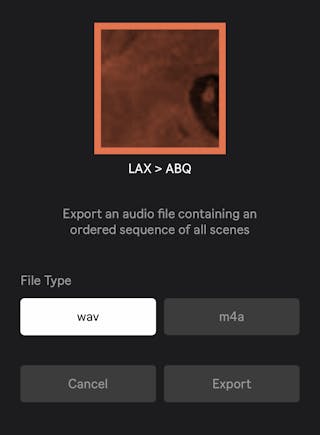
From the Set Settings menu, select Export Audio to access the audio export settings. The audio file will contain an ordered sequence of all scenes within the Set, starting from top to bottom. The longest clip in each scene sets the length of that scene in the recorded file.
You can choose between an uncompressed WAV file (48 kHz, 16-bit) or a compressed M4A file (48 kHz, 32-bit) for your exported audio. Choose your preferred file type and then press Export to continue.
The audio file will start rendering and Note will display a progress bar that indicates the status of the process. Once complete, an audio preview of the finished recording will appear.
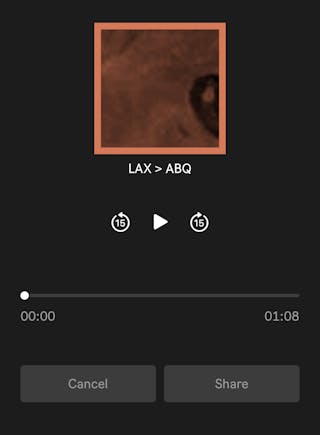
When you’re ready, tap Share to bring up the iOS share menu, where you can save the exported file to your device or share it with other apps.
Alternatively, you can tap Cancel to exit the audio preview and go back to the Session View.